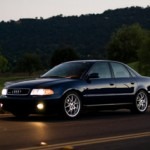
Since the quality and quantity of photos you take of your used car, truck, van, SUV or motorcycle can play a roll in getting it sold, the question arises: How can you take better photos of your vehicles? Here are a few tips that will help out.
- Camera
Learning how your camera works is the difference between an O.K. photo and a great photo. If you leave your camera on “Auto” or “P” mode, expect mediocre results. When you need to get a photo where the foreground is in focus and the background is blurred, choose A or Aperture priority mode and lower the f stop setting as low as your camera will allow. This number depends on the camera, but most “point and click” camera’s will be in the 2’s (2.6,2.4). If you want a photo where everything is in focus, raise this number up to 6-8. For even better results, learn how to set the aperture, shutter speed, and ISO to get the look you want for each photo. You can check the owners manual that came with your camera, or read a little about it on this excellent photography tutorial site. One thing is for sure, you don’t need an expensive camera to achieve great results. - Lighting and Setting
Where you take the photo has a great deal to do with how crisp the image turns out. Time of day, amount of shade, and whether you use artificial light all have a bearing on the final image. Choose a time when the sun isn’t directly overhead, either early in the morning or towards dusk. Park the vehicle in a well shaded area, against a wall, under a tree, or something similar. If it is to dark inside the vehicle, use the flash, but if you can, adjust the flash output so that it isn’t to intense. Try to find a spot where the background isn’t busy. Other objects will detract from your photo. - Subject
You aren’t just taking pictures of a car, you are selling why the customer should come to the lot and see that particular vehicle over all the others. You need to take photos of what’s important, but don’t overwhelm. To many pictures and the potential customer will lose patience waiting for a picture of the ash tray to download. To little and you haven’t made shown them enough to get them excited. Don’t worry about being too artistic, after all, this isn’t a magazine shoot. But do try and cover the whole vehicle inside and out and take your photos from the point of view of the customer walking around and looking your vehicle over. This can usually be accomplished with anywhere between 12 and 36 photos, depending on if it’s a higher end vehicle. - Image Size
You don’t need to set your camera to it’s highest resolution setting. Why not? High megapixel camera’s are good for large photos like the family portrait above the mantel and large posters for the office. When it comes to the internet, smaller resolution photos with 1024 x 768 size photos or less are the best. After all, people are now accessing your vehicles on smart phones, and if your pictures take to long to load they will simply move on to the next one, maybe your competitors. Keep your photo size small and you’ll save yourself a lot of time uploading your images as well. - Front Line Ready
Repeat after me, “I will not take photos of my car until it is front line ready”. So many times I see dealers taking photos of their cars just to get it up quick even though there is a lot of work left to do. If you have to get a vehicle up fast, make sure it is in decent condition, no amount of zooming out is going to hide a serious flaw. Better to wait until your reconditioning is done to present it to your buyer. Remember, in a large decision purchase like buying a car, most buyers take their time and weigh out their options. Presenting it when it’s front line ready is a good habit to get into.
If you practice a few of these points you will find that customers will comment about it, and really, that’s the best feedback you can get.